Posted on March 19, 2017
When I started deep learning last year, I installed Ubuntu with the default Unity desktop environment. Unity gets a lot of flak from users of other Linux distributions. I’m writing to dispel some of that flak.
First off, all Linux desktop environments are massively better than they were even five years ago. If you think Linux is still terminals and outdated design, you’re sorely mistaken.
Why Linux? If you’re going to be doing deep learning, you’re probably going to be using either Linux or Mac. That’s because developers of deep learning tools prefer writing for Unix-based operating systems. Unfortunately, since Mac is hard to equip with a decent GPU, you’re pretty much stuck with Linux. Sure, Windows recently got TensorFlow support, but you’ll find that TensorFlow updates and support for Windows are always a bit behind, and this goes for other deep learning packages too. Furthermore, if you have an issue with a deep learning library on Windows, it can be hard to find help, and to fix. Since library developers use Linux, most of these sort of issues are addressed already, or they have user-written solutions. That said, if you’re still attached to Windows, you can always just dual boot like I do. If you’re attached to Mac, you can make Ubuntu 16.04 look just like Mac OSX.
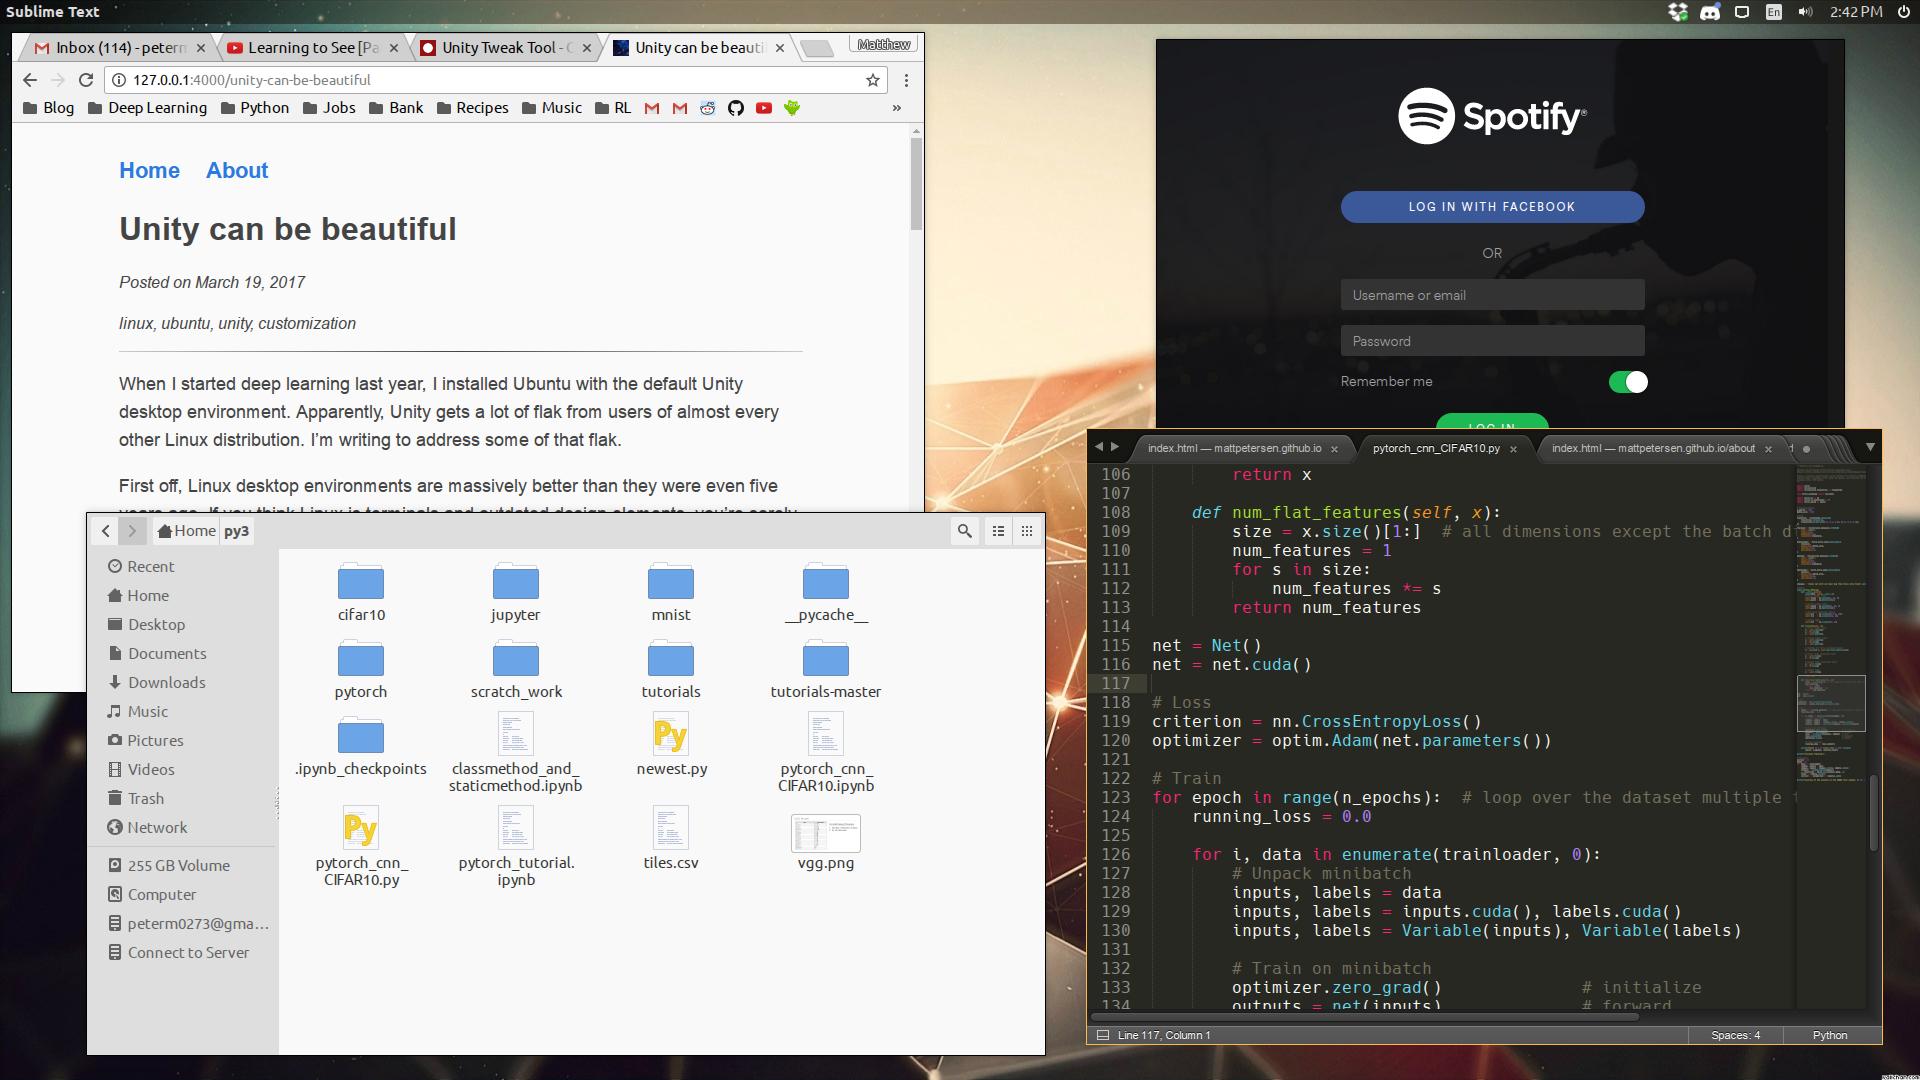
At first encounter, Unity is pretty jarring.
The icons are humongous, the launcher and docker both use a rounded 3-d theme that hearkens back to 2010, and every window has an ugly header. To my shock, even windows like Spotify and Discord which are supposed to have their own built-in headers use the awful Ubuntu headers instead. Luckily, you can fix all of this distasteful stuff in just 10 or 20 minutes.
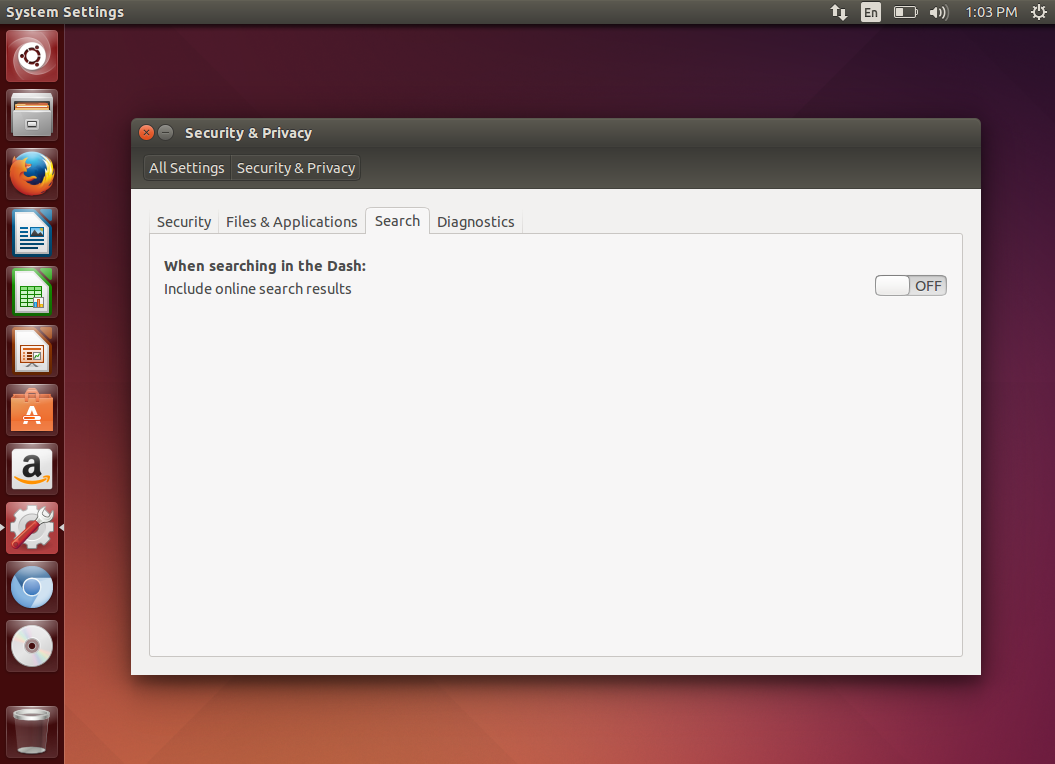
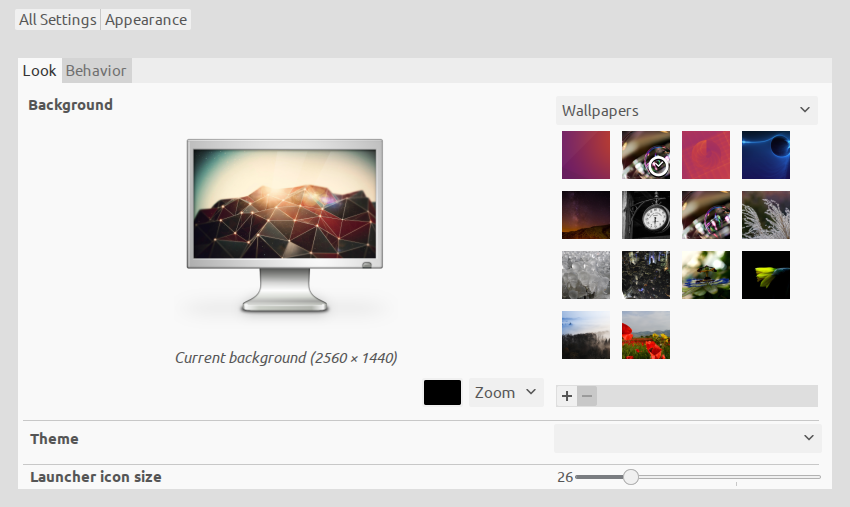
You can shrink the launcher from the system menu.
You can move the launcher to the bottom by using the unity tweak tool. To install, type
sudo apt-get install unity-tweak-tool gnome-tweak-tool
Then find it in your applications and launch it. The tool should look like this
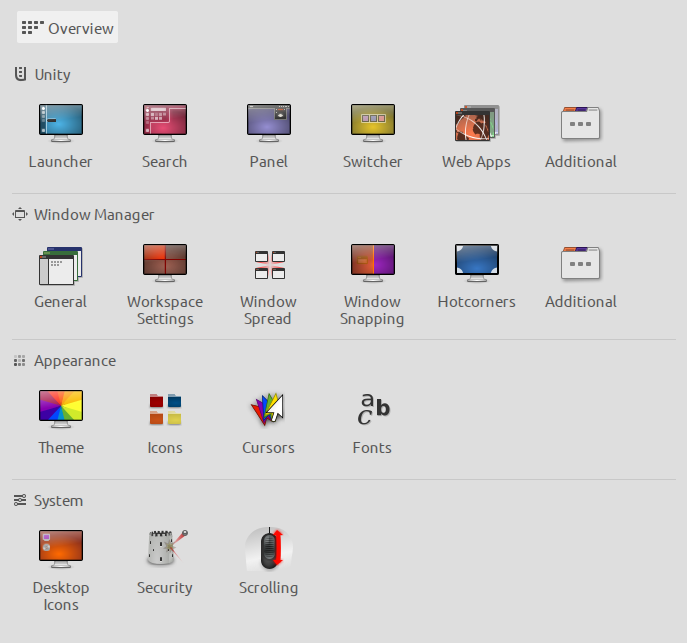
Click launcher in the upper left and you’ll see this
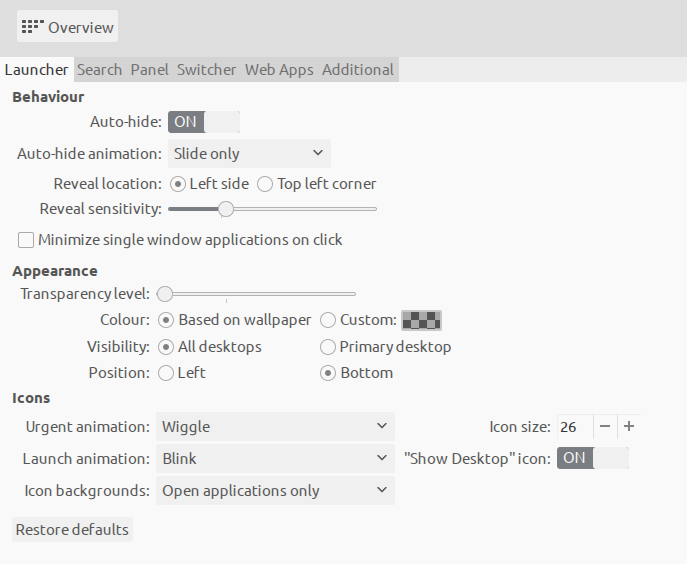
I like mine on the bottom, auto-hidden, and completely opaque. You can change tons of other Unity features with this tool, but not every feature. To remove window headers, you’ll need one more tool.
Removing window headers comes with a few caveats, all of which are worthwhile and more efficient once you get used to them. Firstly, you’ll have to alt + left click to drag windows, although snap-resizing still works. Secondly, you’ll have to use alt + f4 to close windows, and alt + space followed by n to minimize windows. In fact, alt + space brings up a small menu with every window adjustment feature that is normally included on window headers. Lastly, in Unity, the title of the window is always displayed in the top bar, so you’re really losing nothing by getting rid of window headers.
A perk of having no windows headers is the extra screen real estate you get. I like to snap windows to the four corners of my screen by using ctrl + alt + 1, ctrl + alt + 7, ctrl + alt + 9, and ctrl + alt + 3, and with each of the four windows having a window header, it looked super cluttered.
So, to remove window headers, create a file named gtk.css in the directory home/.config/gtk-3.0, or home/.config/gtk-2.0 if that’s the only directory listed. I think Ubuntu 12.04 was the first to introduce gtk-3.0, but correct me if I’m wrong. Also, .config is a hidden directory, so you might need to press ctrl + h to see it if you’re using a visual file browser. Here’s what my gtk.css file looks like.
UnityDecoration {
/* One pixel border */
-UnityDecoration-extents: 1px 1px 1px 1px;

/* No shadows */
-UnityDecoration-shadow-offset-x: 0px;
-UnityDecoration-shadow-offset-y: 0px;
-UnityDecoration-active-shadow-radius: 0px;
}


/* Light blue around active window */
UnityDecoration.top {
background-image: none;
background-color: #90D0FF;
}

UnityDecoration.left {
background-image: none;
background-color: #90D0FF;
}

UnityDecoration.right {
background-image: none;
background-color: #90D0FF;
}

UnityDecoration.bottom {
background-image: none;
background-color: #90D0FF;
}


/* Black around inactive window */
UnityDecoration.top:backdrop {
background-image: none;
background-color: #000000;
}

UnityDecoration.left:backdrop {
background-image: none;
background-color: #000000;
}

UnityDecoration.right:backdrop {
background-image: none;
background-color: #000000;
}

UnityDecoration.bottom:backdrop {
background-image: none;
background-color: #000000;
}
It removes all shadows, puts a one pixel black border around every window, and changes the color of that one pixel border to light blue for the active window. After adding this file, log out and log back in to see the change. If you don’t like it, simply delete the gtk.css file you created, and things will be back to normal. One last note: this might fail to remove shadows, in which case you should proceed to the following step.
If the above step failed to remove shadows, then we need to tell Unity to have gtk.css override your theme’s shadow settings. The tool we need here is compizconfig. To install, type
sudo apt-get update
sudo apt-get install compizconfig-settings-manager
Compizconfig has a lot of overlap with unity tweak tool, but allows you to do even more. This power comes with some drawbacks - you can completely ruin your visual environment, and then you’ll have to use terminal to restore the default settings (not the end of the world, but quite scary).
If you open compizconfig, it should look like this.
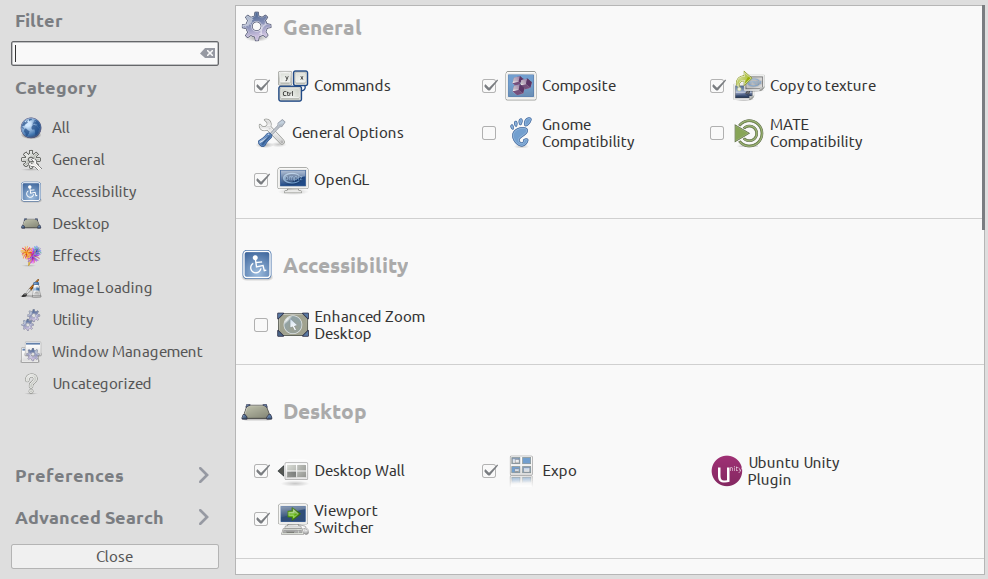
If you click Ubuntu Unity Plugin, you’ll see a menu like this
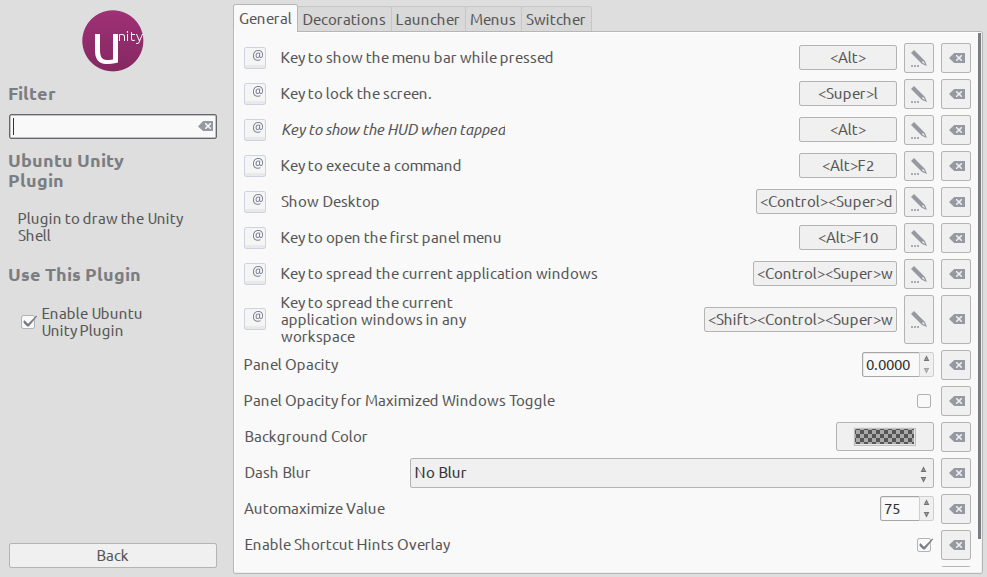
Click the decorations tab to see this.
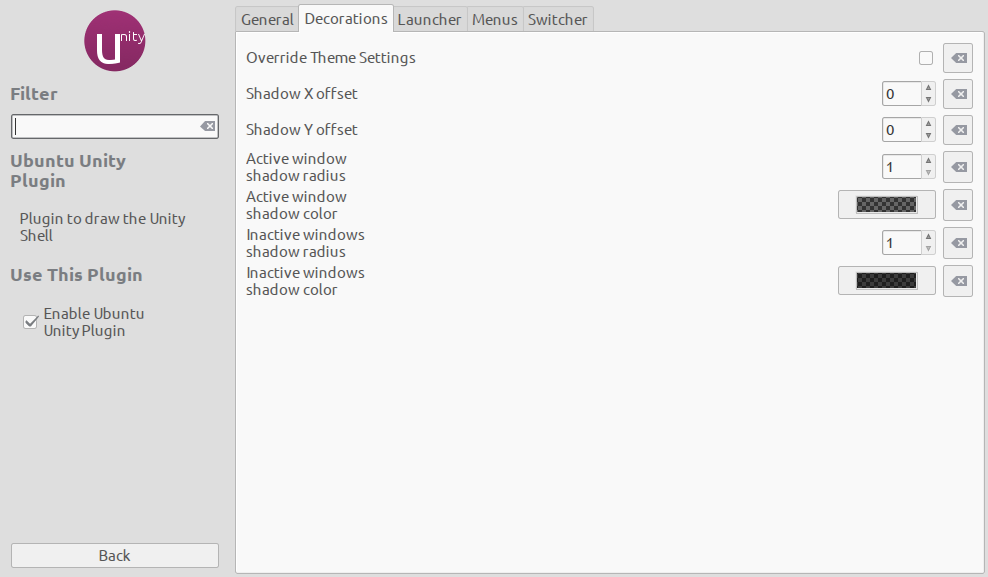
This tab lets us adjust window shadows, but not below the size of one pixel (annoying). To completely erase window shadows, make sure Override Theme Settings is not checked, so that our gtk.css file dictates the shadow settings, which we had specified as being zero pixels in size.
I hope you liked this walk-through to get your Unity desktop uncluttered. Feel free to change the color of the active window border in gtk.css, or make any other modifications. Do be careful messing around with compizconfig.
One more quick Unity beautification you can do is better font rendering. Just install infinality, choose the setting called infinality, and then edit one line inside of a CSS file to also reflect infinality. The tutorial I followed for all that is here. That’s it - cheers, and welcome to the most beautiful operating system of your life :)